
|
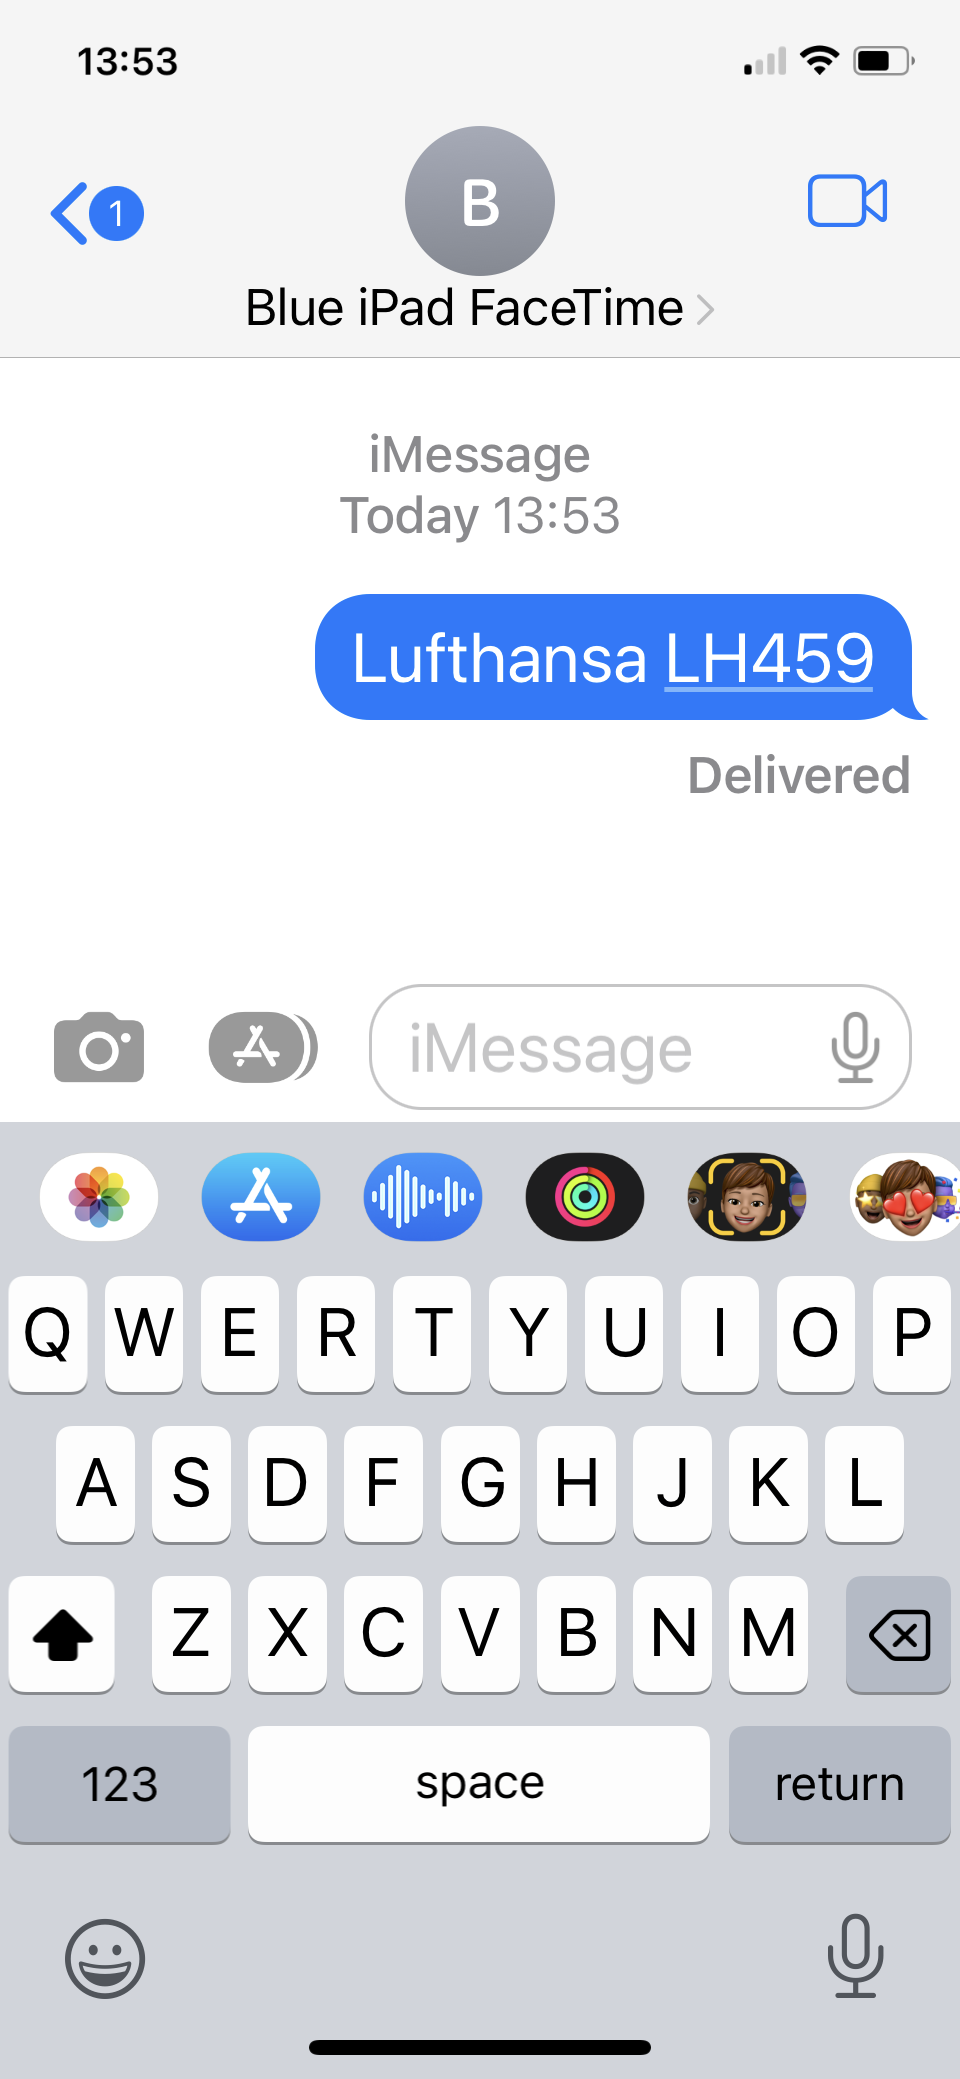
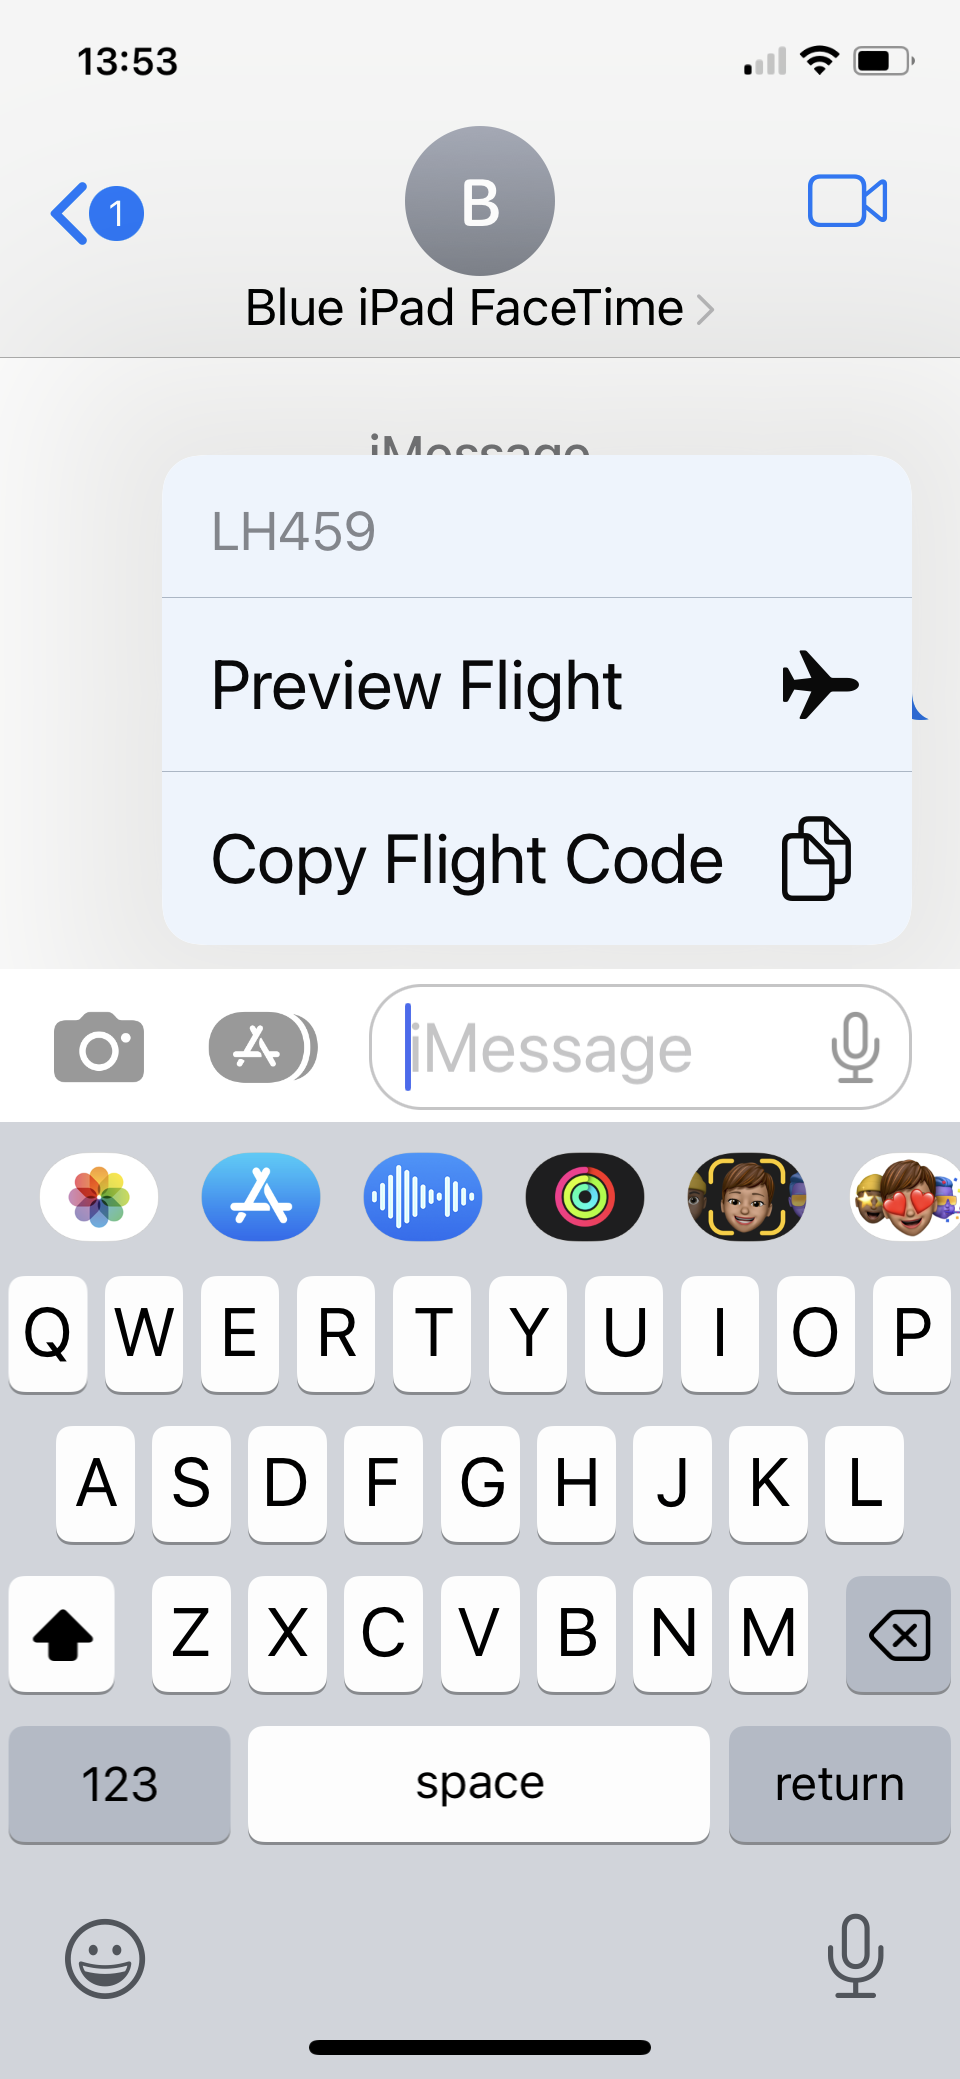
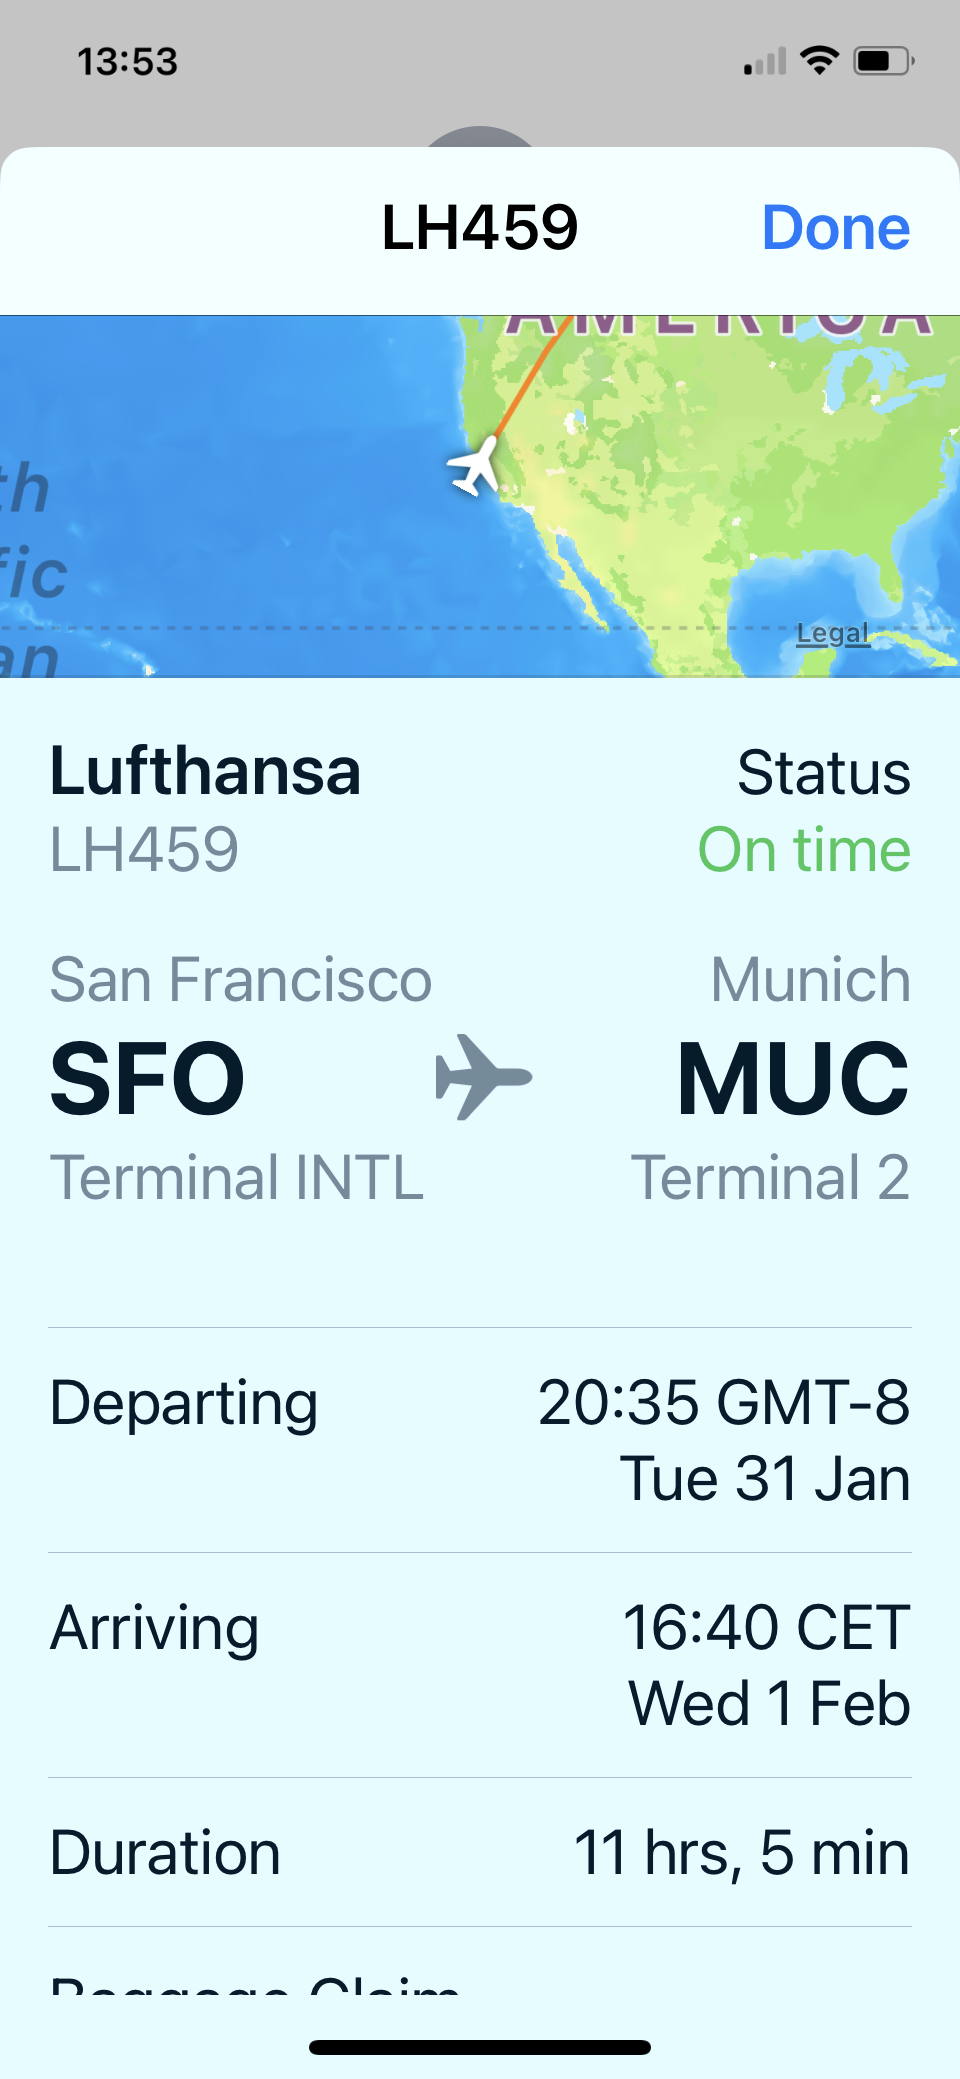
Flight tracker apps have become a popular way to keep track of flights, including take off/arrival times and even those dreaded delays! But you may not know that if you have an iPhone or a Mac, you don’t actually need a third-party app to track a flight, as this handy feature is already built-in to the operating systems. Read on to find out more…  For several years now Apple has been integrating data detectors into its iOS and macOS systems, which can recognise things like dates, times and addresses and turn them into tappable links. Tracking Flights in Messages If someone sends you a flight number in Messages (e.g. Lufthansa LH459), tap on the underlined number and a sub-menu should pop up with the option to ‘Preview Flight’. Click on this and you’ll see a summary of the flight’s progress, airports, whether it’s on time, departure and arrival times, flight duration etc. Tip: To increase the chances of iOS detecting the flight number, try where possible to include the name of the airline in addition to the number.
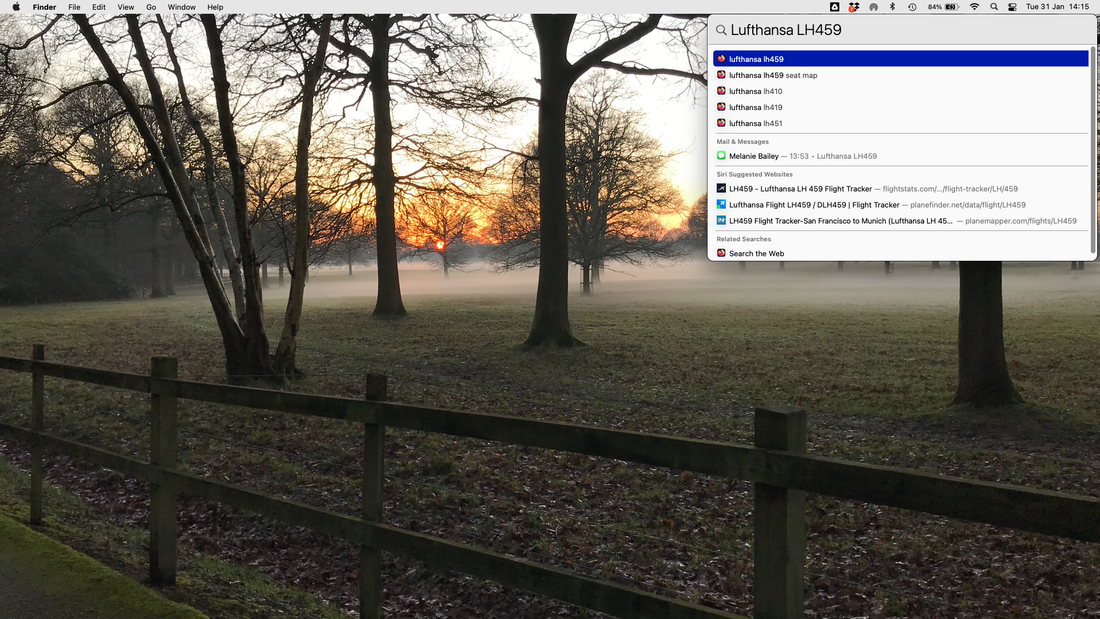
Tracking Flights on a Mac The same data detectors are included in macOS, so you can also track flights on your Mac, using Spotlight. To open Spotlight, either click on the little magnifying glass icon in the Menu Bar at the top right-hand corner of your screen (see first image below), or click ‘cmd’ and the spacebar together. Then type the flight number into the Spotlight search bar and click on one of the results to find out more information.
And that’s all there is to it – happy flight tracking!
0 Comments
If you are looking at buying or selling a Mac that is less than two years old, you need to be aware of Apple’s Activation Lock, otherwise you may inadvertently end up with a Mac that cannot be used. Read on to find out more. Apple Macs are renowned for their security measures. If your Mac is stolen, it’s very difficult for the thief to bypass the inbuilt security measures, so long as you have taken advantage of the tools at your disposal to secure your machine. However, these same tools can consign a Mac to the scrapheap if you don’t fully understand them. According to Apple, with Activation Lock: “…your Apple ID password or device passcode is required before anyone can turn off Find My, erase your Mac, or reactivate and use your Mac. Even if you erase your Mac remotely, Activation Lock can continue to deter others from reactivating your Mac without your permission. All you need to do is keep Find My turned on and remember your Apple ID and password.” The flip side of this is that if a Mac is sold without Activation Lock first being disabled, it will still be associated with the previous Apple ID, and the new owner won’t be able to gain access, even if it has been erased… essentially rendering the machine useless. A recent Tweet by an American independent computer repair specialist, John Bumstead, complains of the “millions” of Macs that have been “condemned… to death” due to Apple’s Activation Lock. 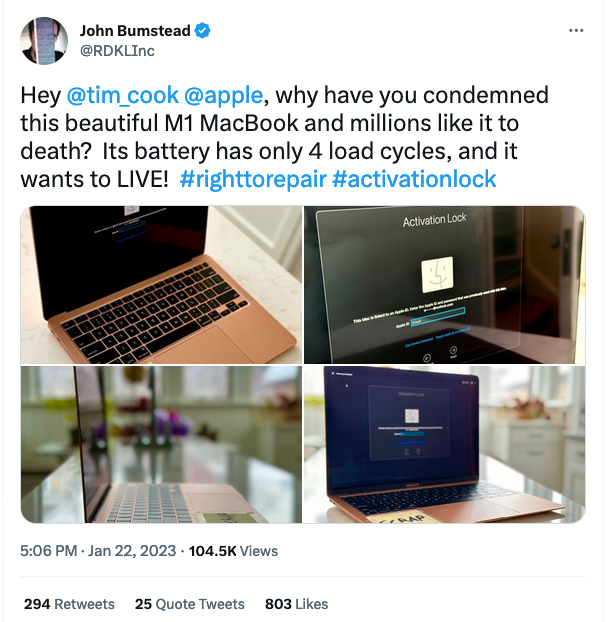 If you are buying or selling such a device second-hand, you need to make sure that the Apple ID has been correctly disassociated from it. You CANNOT just wipe the drive and reinstall the operating system; you must also disable Find My Mac and Activation Lock. This means that if you are buying a second-hand Mac, check with the seller that they have followed the correct procedures, and that you are able to contact them for their Apple ID info if Activation Lock kicks in. If you would like any further information about this topic or would like some assistance with preparing your Mac for resale, contact us.
Blue Apple Systems sells both new and second-hand Macs. However, we only sell second-hand Macs that we have supplied from new and have been correctly prepared for sale. Before selling your Mac or handing it over to a family member or friend, you may be surprised to know that just logging out of your Apple ID or clicking ‘erase’ may not be sufficient! Read on to discover the 9 (or if you’re lucky, just 2!) steps you should take. 
Congratulations! You have now completed the steps necessary to leave your old Mac in an ‘out-of-the-box’ state, ready for its new owner.
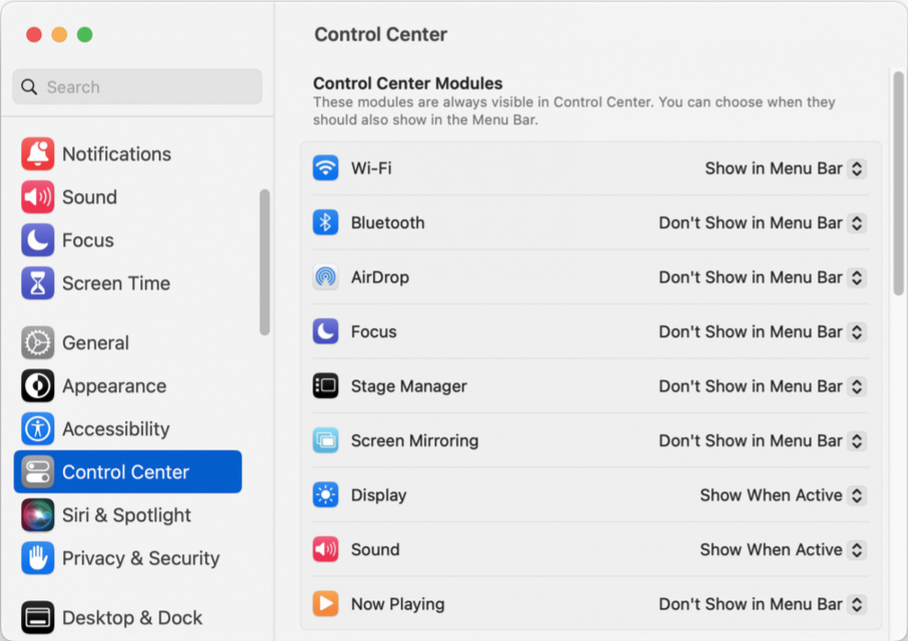
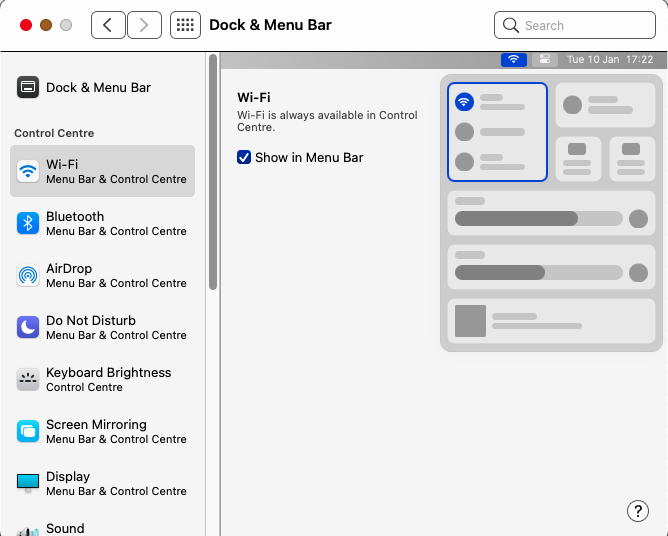
However, if this all sounds a bit too complicated, or you’d just prefer that someone else does it for you, please contact us at Blue Apple Systems and we will be happy to help. The Menu Bar along the top of your Mac screen can show system icons for a multitude of features and functions, such as battery status, date/time and Wi-Fi signal strength. But did you know that you can easily customise what is shown in the menu bar? Read our latest blog to find out how. 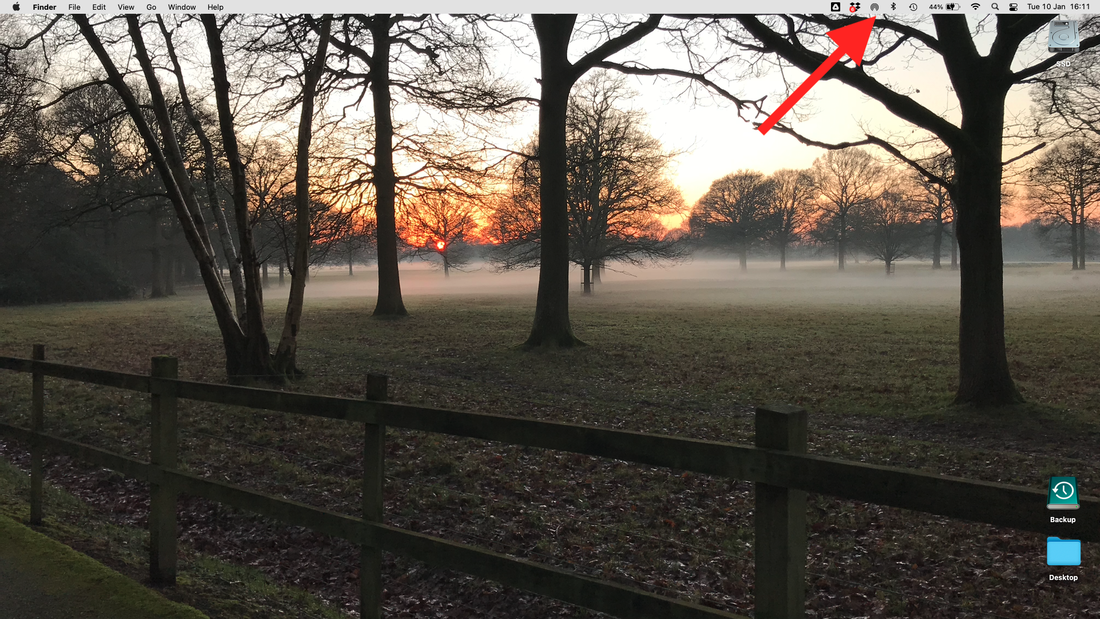 Rearranging Icons in Your macOS Menu Bar Moving icons around on the Menu Bar is super-simple! Some of the icons, such as the date/time and Control Centre, are locked in place, but others can be easily moved around. Simply hold down the ‘cmd’ key (the key to the left of your space bar), click on an icon, and then drag and drop along the Menu Bar to the location you would like it to live. Removing Icons from Your macOS Menu Bar Removing an icon from your Menu Bar is also simple. Hold down the ‘cmd’ key, click on the icon and then drag it downwards away from the Menu Bar. An ‘X’ will appear – let go of the icon and it will disappear. Note: you haven’t deleted the actual feature/function, just removed the shortcut from the Menu Bar. Adding Icons to Your macOS Menu Bar You can also add new items to your Menu Bar. IMHO the best way to do this is from the Control Centre in System Preferences (as it gives you more options to add than via the Control Centre icon in the Menu Bar). Go to System Preferences > Control Centre (in older macOS versions, go to System Preferences > Dock and Menu Bar). Down the left-hand side of the window that opens up, you will see a list of all the Modules available to you. To the right of this list is a menu that lets you select where and when the option will appear. The settings available are ‘Show in Menu Bar’, ‘Don’t Show in Menu Bar’ (or check/uncheck a tick box in older macOS versions) and, for some, ‘Show when active’.
If you have any questions about this, or any other Mac-related queries, please call Richard on 01403 753666 and he will be happy to help.
|

 RSS Feed

Blue Apple Systems Ltd
Unit 6 Alfold Business Centre Loxwood Road, Alfold Surrey, GU6 8HP 01403 753666. |
Blue Apple Systems Limited is authorised and regulated by the Financial Conduct Authority. Blue Apple Systems Limited is not a lender, but a licensed credit broker, licensed to introduce borrowers and lenders
for the purposes of entering into short-term leasing agreements. Blue Apple Systems Limited does not charge customers a fee for using its broker services, but receives a 1.5% to 2% commission from lenders if a customer enters into a consumer credit agreement with a lender following introduction. © Blue Apple Systems Ltd 2015. All Rights Reserved. Blue Apple Systems Ltd is registered in the UK. Company registration number 05110252. VAT No 827058618. All prices are subject to VAT at the current rate of 20%. |